环境准备 软件版本
CentOS7.9.2009
docker 24.0.6
keepalived 1.3.5
haproxy 1.5.18
kubernetes 1.28.2
calico v3.26.1
dashboard 2.7.0
准备服务器 这里准备了四台CentOS虚拟机,每台2核cpu和2G内,所有操作都是使用root账户。虚拟机具体信息如下表:
IP地址
Hostname
节点角色
192.168.146.130
node130
control plane
192.168.146.131
node131
control plane
192.168.146.132
node132
worker nodes
192.168.146.133
node133
worker nodes
192.168.146.200
VIP
生产机集群至少需要三台
常用软件安装 1 yum install -y wget vim net-tools
关闭、禁用防火墙 1 2 3 systemctl disable firewalld systemctl stop firewalld systemctl status firewalld
禁用SELinux 1 setenforce 0 && sed -i 's/SELINUX=enforcing/SELINUX=disabled/g' /etc/selinux/config
禁用swap 1 swapoff -a && sed -i '/ swap / s/^\\(.*\\)$/#\\1/g' /etc/fstab
修改linux内核参数 1 2 3 4 5 6 7 8 9 10 11 12 13 14 15 16 17 18 19 20 21 22 23 # 新增 modprobe br_netfilter modprobe overlay lsmod |grep br_netfilter lsmod |grep overlay # 永久新增 cat > /etc/sysconfig/modules/br_netfilter.modules << EOF modprobe br_netfilter modprobe overlay EOF chmod 755 /etc/sysconfig/modules/br_netfilter.modules # 写入配置文件 cat <<EOF > /etc/sysctl.d/k8s.conf vm.swappiness=0 net.ipv4.ip_forward = 1 net.bridge.bridge-nf-call-ip6tables = 1 net.bridge.bridge-nf-call-iptables = 1 EOF # 生效配置文件 sysctl -p /etc/sysctl.d/k8s.conf
配置ipvs 1 2 3 4 5 6 7 8 9 10 11 12 13 14 yum install ipset ipvsadm -y cat > /etc/sysconfig/modules/ipvs.modules <<EOF #!/bin/bash modprobe -- ip_vs modprobe -- ip_vs_rr modprobe -- ip_vs_wrr modprobe -- ip_vs_sh modprobe -- nf_conntrack EOF chmod +x /etc/sysconfig/modules/ipvs.modules && bash /etc/sysconfig/modules/ipvs.modules && lsmod | grep -e ip_vs -e nf_conntrack
安装容器环境 安装docker 1 2 3 4 5 6 7 8 9 10 11 12 13 14 15 16 17 18 19 20 21 22 yum install -y yum-utils device-mapper-persistent-data lvm2 yum-config-manager --add-repo http://mirrors.aliyun.com/docker-ce/linux/centos/docker-ce.repo yum install -y docker-ce tee /etc/docker/daemon.json <<-'EOF' { "exec-opts" :["native.cgroupdriver=systemd" ], "registry-mirrors" : [ "http://ovfftd6p.mirror.aliyuncs.com" , "http://hub-mirror.c.163.com" , "https://zt8w2oro.mirror.aliyuncs.com" , "http://registry.docker-cn.com" , "http://docker.mirrors.ustc.edu.cn" , "https://node128" ] } EOF systemctl enable docker systemctl start docker
配置cri-docker 1 2 3 4 5 6 7 8 # https://github.com/Mirantis/cri-dockerd/releases wget https://github.com/Mirantis/cri-dockerd/releases/download/v0.3.4/cri-dockerd-0.3.4-3.el7.x86_64.rpm rpm -ivh cri-dockerd-0.3.4-3.el7.x86_64.rpm vim /usr/lib/systemd/system/cri-docker.service # ExecStart=/usr/bin/cri-dockerd --pod-infra-container-image=registry.aliyuncs.com/google_containers/pause:3.9 --container-runtime-endpoint fd:// systemctl start cri-docker systemctl enable cri-docker cri-dockerd --version
高可用环境搭建 安装haproxy 1 2 3 4 5 6 7 8 9 10 11 12 13 14 15 16 17 18 19 20 21 22 23 24 25 26 27 28 29 30 31 32 33 34 35 36 37 38 39 40 41 42 43 44 45 46 47 48 49 50 51 52 53 54 55 56 57 58 yum install -y haproxy tee /etc/haproxy/haproxy.cfg <<EOF global log 127.0.0.1 local2 chroot /var/lib/haproxy pidfile /var/run/haproxy.pid maxconn 4000 user haproxy group haproxy daemon stats socket /var/lib/haproxy/stats #--------------------------------------------------------------------- # common defaults that all the 'listen' and 'backend' sections will # use if not designated in their block #--------------------------------------------------------------------- defaults mode http log global option httplog option dontlognull option http-server-close option forwardfor except 127.0.0.0/8 option redispatch retries 3 timeout http-request 10s timeout queue 1m timeout connect 10s timeout client 1m timeout server 1m timeout http-keep-alive 10s timeout check 10s maxconn 3000 #--------------------------------------------------------------------- # apiserver frontend which proxys to the masters #--------------------------------------------------------------------- frontend k8s-apiserver bind *:9443 mode tcp option tcplog default_backend k8s-apiserver #--------------------------------------------------------------------- # round robin balancing for apiserver #--------------------------------------------------------------------- backend k8s-apiserver mode tcp option tcplog option tcpcheck balance roundrobin server node131 192.168.146.131:6443 check server node130 192.168.146.130:6443 check EOF systemctl start haproxy systemctl enable haproxy
安装keeplived 1 2 yum -y install keepalived
node130节点配置
1 2 3 4 5 6 7 8 9 10 11 12 13 14 15 16 17 18 19 20 21 22 23 24 25 26 27 28 29 30 31 32 tee /etc/keepalived/keepalived.conf <<EOF ! Configuration File for keepalived global_defs { router_id LVS_DEVEL } vrrp_script chk_haproxy { script "/bin/bash -c 'if [[ \$(netstat -nlp | grep 9443) ]]; then exit 0; else exit 1; fi'" # haproxy 检测 interval 2 # 每2秒执行一次检测 weight 11 # 权重变化 } vrrp_instance VI_1 { state MASTER interface ens33 virtual_router_id 51 priority 100 advert_int 1 authentication { auth_type PASS auth_pass 1111 } virtual_ipaddress { 192.168.146.200 } track_script { chk_haproxy } } EOF
node131节点配置
1 2 3 4 5 6 7 8 9 10 11 12 13 14 15 16 17 18 19 20 21 22 23 24 25 26 27 28 29 tee /etc/keepalived/keepalived.conf <<EOF ! Configuration File for keepalived global_defs { router_id LVS_DEVEL } vrrp_script chk_haproxy { script "/bin/bash -c 'if [[ $(netstat -nlp | grep 9443) ]]; then exit 0; else exit 1; fi'" # haproxy 检测 interval 2 # 每2秒执行一次检测 weight 11 # 权重变化 } vrrp_instance VI_1 { state BACKUP interface ens33 virtual_router_id 51 priority 90 advert_int 1 authentication { auth_type PASS auth_pass 1111 } virtual_ipaddress { 192.168.146.200 } track_script { chk_haproxy } } EOF
启动keepalived
1 2 3 4 systemctl start keepalived systemctl enable keepalived ip a
安装 kubernetes 设置kubernetes源 1 2 3 4 5 6 7 8 9 10 11 12 13 # 所有节点配置 cat <<EOF > /etc/yum.repos.d/kubernetes.repo [kubernetes] name=Kubernetes baseurl=https://mirrors.aliyun.com/kubernetes/yum/repos/kubernetes-el7-x86_64/ enabled=1 gpgcheck=1 # 阿里云gpgcheck不过,关闭验证 repo_gpgcheck=0 gpgkey=https://mirrors.aliyun.com/kubernetes/yum/doc/yum-key.gpg https://mirrors.aliyun.com/kubernetes/yum/doc/rpm-package-key.gpg EOF yum clean all
安装kubeadm 1 2 3 4 5 6 7 8 # 所有节点 安装kubelet kubeadm kubectl;kubeadm依赖kubelet和kubectl yum install -y kubelet kubeadm kubectl kubectl version # 修改内容如下 echo KUBELET_EXTRA_ARGS=\"--cgroup-driver=systemd\" > /etc/sysconfig/kubelet systemctl enable kubelet systemctl daemon-reload systemctl restart kubelet
下载镜像 1 2 3 # 查看k8s依赖的镜像,可以在node130上逐个手动下载 kubeadm config images list kubeadm config images pull --image-repository registry.aliyuncs.com/google_containers --cri-socket=unix:///var/run/cri-dockerd.sock
master初始化 1 2 3 4 5 6 7 8 9 10 11 12 13 14 15 16 17 18 19 20 21 22 23 24 25 26 27 28 29 30 31 32 33 34 35 36 37 38 39 40 41 42 43 44 45 46 47 48 49 50 51 52 53 kubeadm init --kubernetes-version=1.28.2 \ --apiserver-advertise-address=192.168.146.200 \ --control-plane-endpoint "192.168.146.200:6443" --image-repository registry.aliyuncs.com/google_containers \ --pod-network-cidr=10.244.0.0/16 \ --cri-socket=unix:///var/run/cri-dockerd.sock Your Kubernetes control-plane has initialized successfully! To start using your cluster, you need to run the following as a regular user: mkdir -p $HOME /.kube sudo cp -i /etc/kubernetes/admin.conf $HOME /.kube/config sudo chown $(id -u):$(id -g) $HOME /.kube/config Alternatively, if you are the root user, you can run: export KUBECONFIG=/etc/kubernetes/admin.conf You should now deploy a pod network to the cluster. Run "kubectl apply -f [podnetwork].yaml" with one of the options listed at: https://kubernetes.io/docs/concepts/cluster-administration/addons/ Then you can join any number of worker nodes by running the following on each as root: kubeadm join 192.168.146.200:6443 --token wbxz7b.6a45sappfa955f3n \ --discovery-token-ca-cert-hash sha256:5752544368948351d9b6a7ed6cb21f53aacc34899503f17f8cd6bebb5836ecc3 mkdir -p /etc/kubernetes/pki/etcdscp root@node130:/etc/kubernetes/admin.conf /etc/kubernetes/ scp root@node130:/etc/kubernetes/pki/{ca.crt,ca.key,sa.key,sa.pub,front-proxy-ca.crt,front-proxy-ca.key} /etc/kubernetes/pki/ scp root@node130:/etc/kubernetes/pki/etcd/{ca.crt,ca.key} /etc/kubernetes/pki/etcd/ kubeadm join 192.168.146.200:6443 --token wbxz7b.6a45sappfa955f3n \ --discovery-token-ca-cert-hash sha256:5752544368948351d9b6a7ed6cb21f53aacc34899503f17f8cd6bebb5836ecc3 \ --control-plane --cri-socket=unix:///var/run/cri-dockerd.sock echo "export KUBECONFIG=/etc/kubernetes/admin.conf" >> ~/.bash_profile source ~/.bash_profilemkdir -p $HOME /.kubesudo cp -i /etc/kubernetes/admin.conf $HOME /.kube/config sudo chown $(id -u):$(id -g) $HOME /.kube/config
第二个master加入时提示
unable to add a new control plane instance to a cluster that doesn’t have a stable controlPlaneEndpoint address
Please ensure that:
The cluster has a stable controlPlaneEndpoint address.
The certificates that must be shared among control plane instances are provided.
解决办法:
kubectl edit cm kubeadm-config -n kube-system 在 kubernetesVersion: v1.28.2 下边 添加 controlPlaneEndpoint: 192.168.146.200:6443
worker节点加入 1 2 3 4 5 6 7 # node132和node133 work 加入集群 kubeadm join 192.168.146.200:6443 --token wbxz7b.6a45sappfa955f3n \ --discovery-token-ca-cert-hash sha256:5752544368948351d9b6a7ed6cb21f53aacc34899503f17f8cd6bebb5836ecc3 \ --cri-socket=unix:///var/run/cri-dockerd.sock # 节点查看 kubectl get nodes # node节点需要较长时间才会Ready kubectl get po -o wide -n kube-system
部署网络 1 2 3 4 5 6 7 8 9 10 11 12 13 14 15 16 17 18 19 20 21 22 23 24 25 26 27 28 29 30 31 32 33 34 35 36 37 # 在node130上安装flannel网络 kubectl create -f https://raw.githubusercontent.com/projectcalico/calico/v3.26.1/manifests/tigera-operator.yaml wget https://raw.githubusercontent.com/projectcalico/calico/v3.26.1/manifests/custom-resources.yaml vim custom-resources.yaml # # This section includes base Calico installation configuration. # For more information, see: https://projectcalico.docs.tigera.io/master/reference/installation/api apiVersion: operator.tigera.io/v1 kind: Installation metadata: name: default spec: # Configures Calico networking. calicoNetwork: # Note: The ipPools section cannot be modified post-install. ipPools: - blockSize: 26 cidr: 10.244.0.0/16 # 修改此行内容 encapsulation: VXLANCrossSubnet natOutgoing: Enabled nodeSelector: all() --- # This section configures the Calico API server. # For more information, see: https://projectcalico.docs.tigera.io/master/reference/installation/api apiVersion: operator.tigera.io/v1 kind: APIServer metadata: name: default spec: {} # kubectl create -f custom-resources.yaml kubectl get pods -n calico-system
查看集群状态 1 2 3 kubectl get pods -n calico-system kubectl get pods -n kube-system kubectl get node -o wide
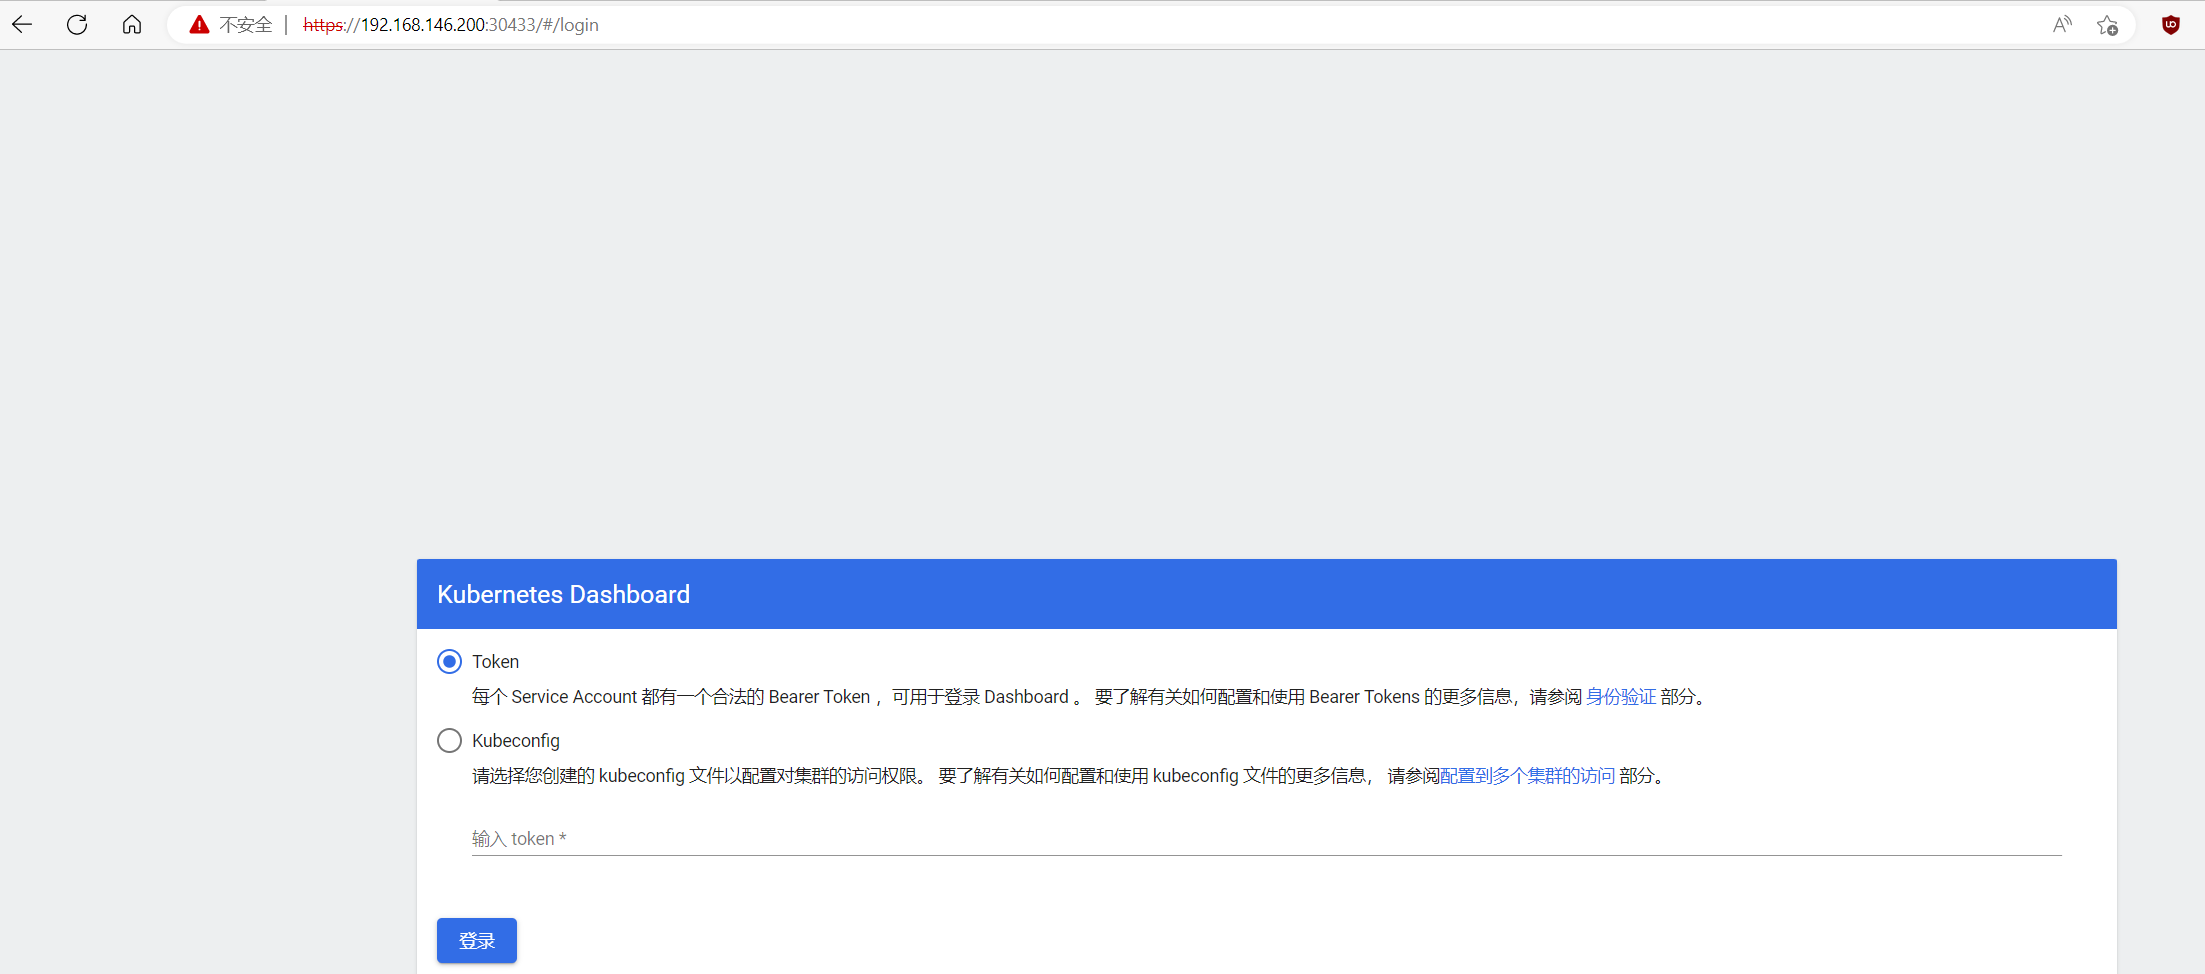
可视化界面dashboard安装 1 2 3 4 5 6 7 8 9 10 11 12 13 14 15 16 17 18 19 20 21 22 23 24 25 26 27 28 29 30 31 32 33 34 35 36 37 38 wget https://raw.githubusercontent.com/kubernetes/dashboard/v2.7.0/aio/deploy/recommended.yaml sed -i "s/kubernetesui/registry.aliyuncs.com\\/google_containers/g" recommended.yaml sed -i "/targetPort: 8443/a\\ \\ \\ \\ \\ \\ nodePort: 30433\\n\\ \\ type: NodePort" recommended.yaml kubectl apply -f recommended.yaml kubectl get all -n kubernetes-dashboard # 新增管理员账号 cat >> dashboard-admin.yaml << EOF --- # ------------------- dashboard-admin ------------------- apiVersion: v1 kind: ServiceAccount metadata: name: dashboard-admin namespace: kubernetes-dashboard --- apiVersion: rbac.authorization.k8s.io/v1 kind: ClusterRoleBinding metadata: name: dashboard-admin subjects: - kind: ServiceAccount name: dashboard-admin namespace: kubernetes-dashboard roleRef: apiGroup: rbac.authorization.k8s.io kind: ClusterRole name: cluster-admin EOF kubectl apply -f dashboard-admin.yaml kubectl -n kubernetes-dashboard create token dashboard-admin eyJhbGciOiJSUzI1NiIsImtpZCI6Inh3cXJ2LVRHVnBuV2FSajdlOVhYbkNIOW9BLXBlQl9uejZlV3FWbDBNaDQifQ.eyJhdWQiOlsiaHR0cHM6Ly9rdWJlcm5ldGVzLmRlZmF1bHQuc3ZjLmNsdXN0ZXIubG9jYWwiXSwiZXhwIjoxNjk2NTI1MTcwLCJpYXQiOjE2OTY1MjE1NzAsImlzcyI6Imh0dHBzOi8va3ViZXJuZXRlcy5kZWZhdWx0LnN2Yy5jbHVzdGVyLmxvY2FsIiwia3ViZXJuZXRlcy5pbyI6eyJuYW1lc3BhY2UiOiJrdWJlcm5ldGVzLWRhc2hib2FyZCIsInNlcnZpY2VhY2NvdW50Ijp7Im5hbWUiOiJkYXNoYm9hcmQtYWRtaW4iLCJ1aWQiOiI1OWNmZjQ3OS03NTYxLTRhMWYtYmU4OC1iZTQxZTEyM2NiZjEifX0sIm5iZiI6MTY5NjUyMTU3MCwic3ViIjoic3lzdGVtOnNlcnZpY2VhY2NvdW50Omt1YmVybmV0ZXMtZGFzaGJvYXJkOmRhc2hib2FyZC1hZG1pbiJ9.qrFSZohZcUnKO_TvgXBrtgnj6F-ezyyjF8QPQjFCcQ_7gSBcMJgTXfqg5RjRibN_dNCyrg4POFzZn2RsJ76_6M8HOy-u5NZ7LOciM28aDGKMPOgZRRmzIbm9HLV40NU4mPZr7pJbL5R-nfbTzCg6sp5HKTX5GIWagSMfVscZP_wIS0SQ4FzfAnhlX2-r8rIj_PDxm47ilt2D_SOA_yO7pBz88wn4y53THwvAb8_C1g6RC837po8xpmn4KeULnPfdelXXv5YHbxWO-xU3TWHlP4iIY_Pe35KpaGXSIBpAQ-Yl6Enf2kyD1nSNUKpPMW2FK4W6yv9BIqeQVrc0O2t7FA
访问https://192.168.146.200:30433
可视化界面kuboard安装 1 2 3 4 5 6 7 8 9 10 docker run -d \ --restart=unless-stopped \ --name=kuboard \ -p 80:80/tcp \ -p 10081:10081/tcp \ -e KUBOARD_ENDPOINT="http://192.168.146.131:80" \ -e KUBOARD_AGENT_SERVER_TCP_PORT="10081" \ -v /root/kuboard-data:/data \ eipwork/kuboard:v3
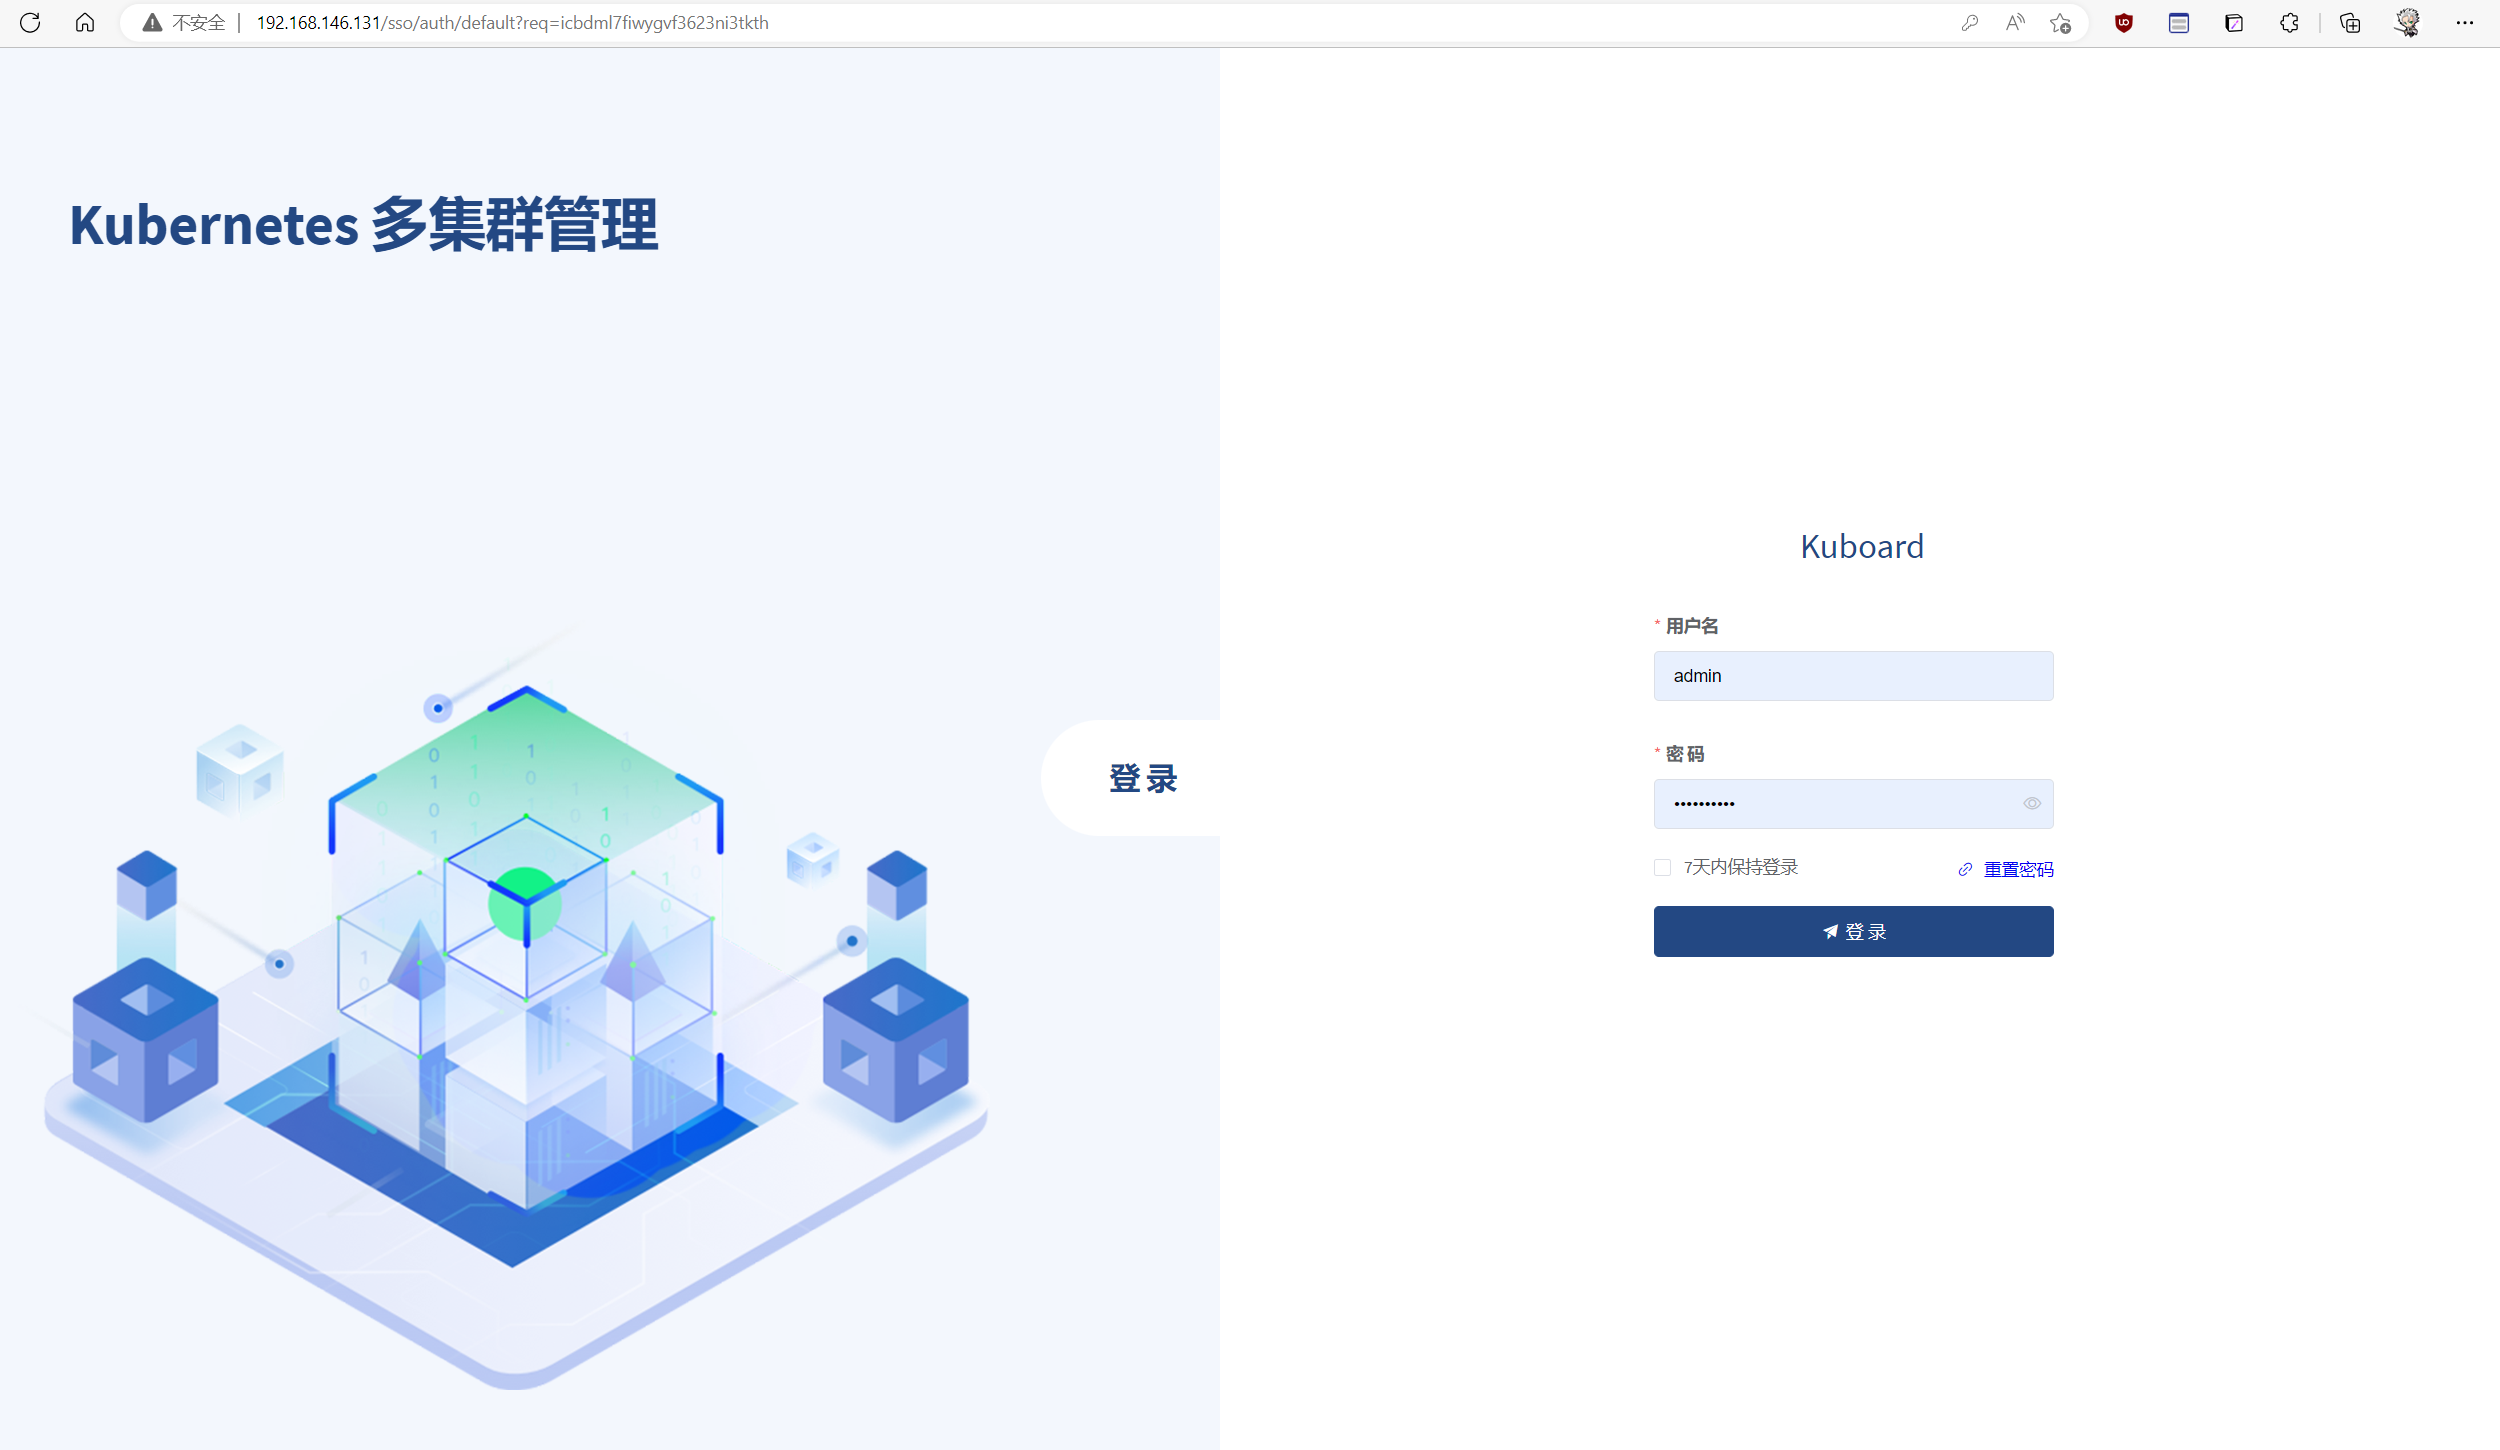
通过浏览器访问 http://192.168.146.131
输入默认默认用户名:admin 密码:Kuborad123 进行登录
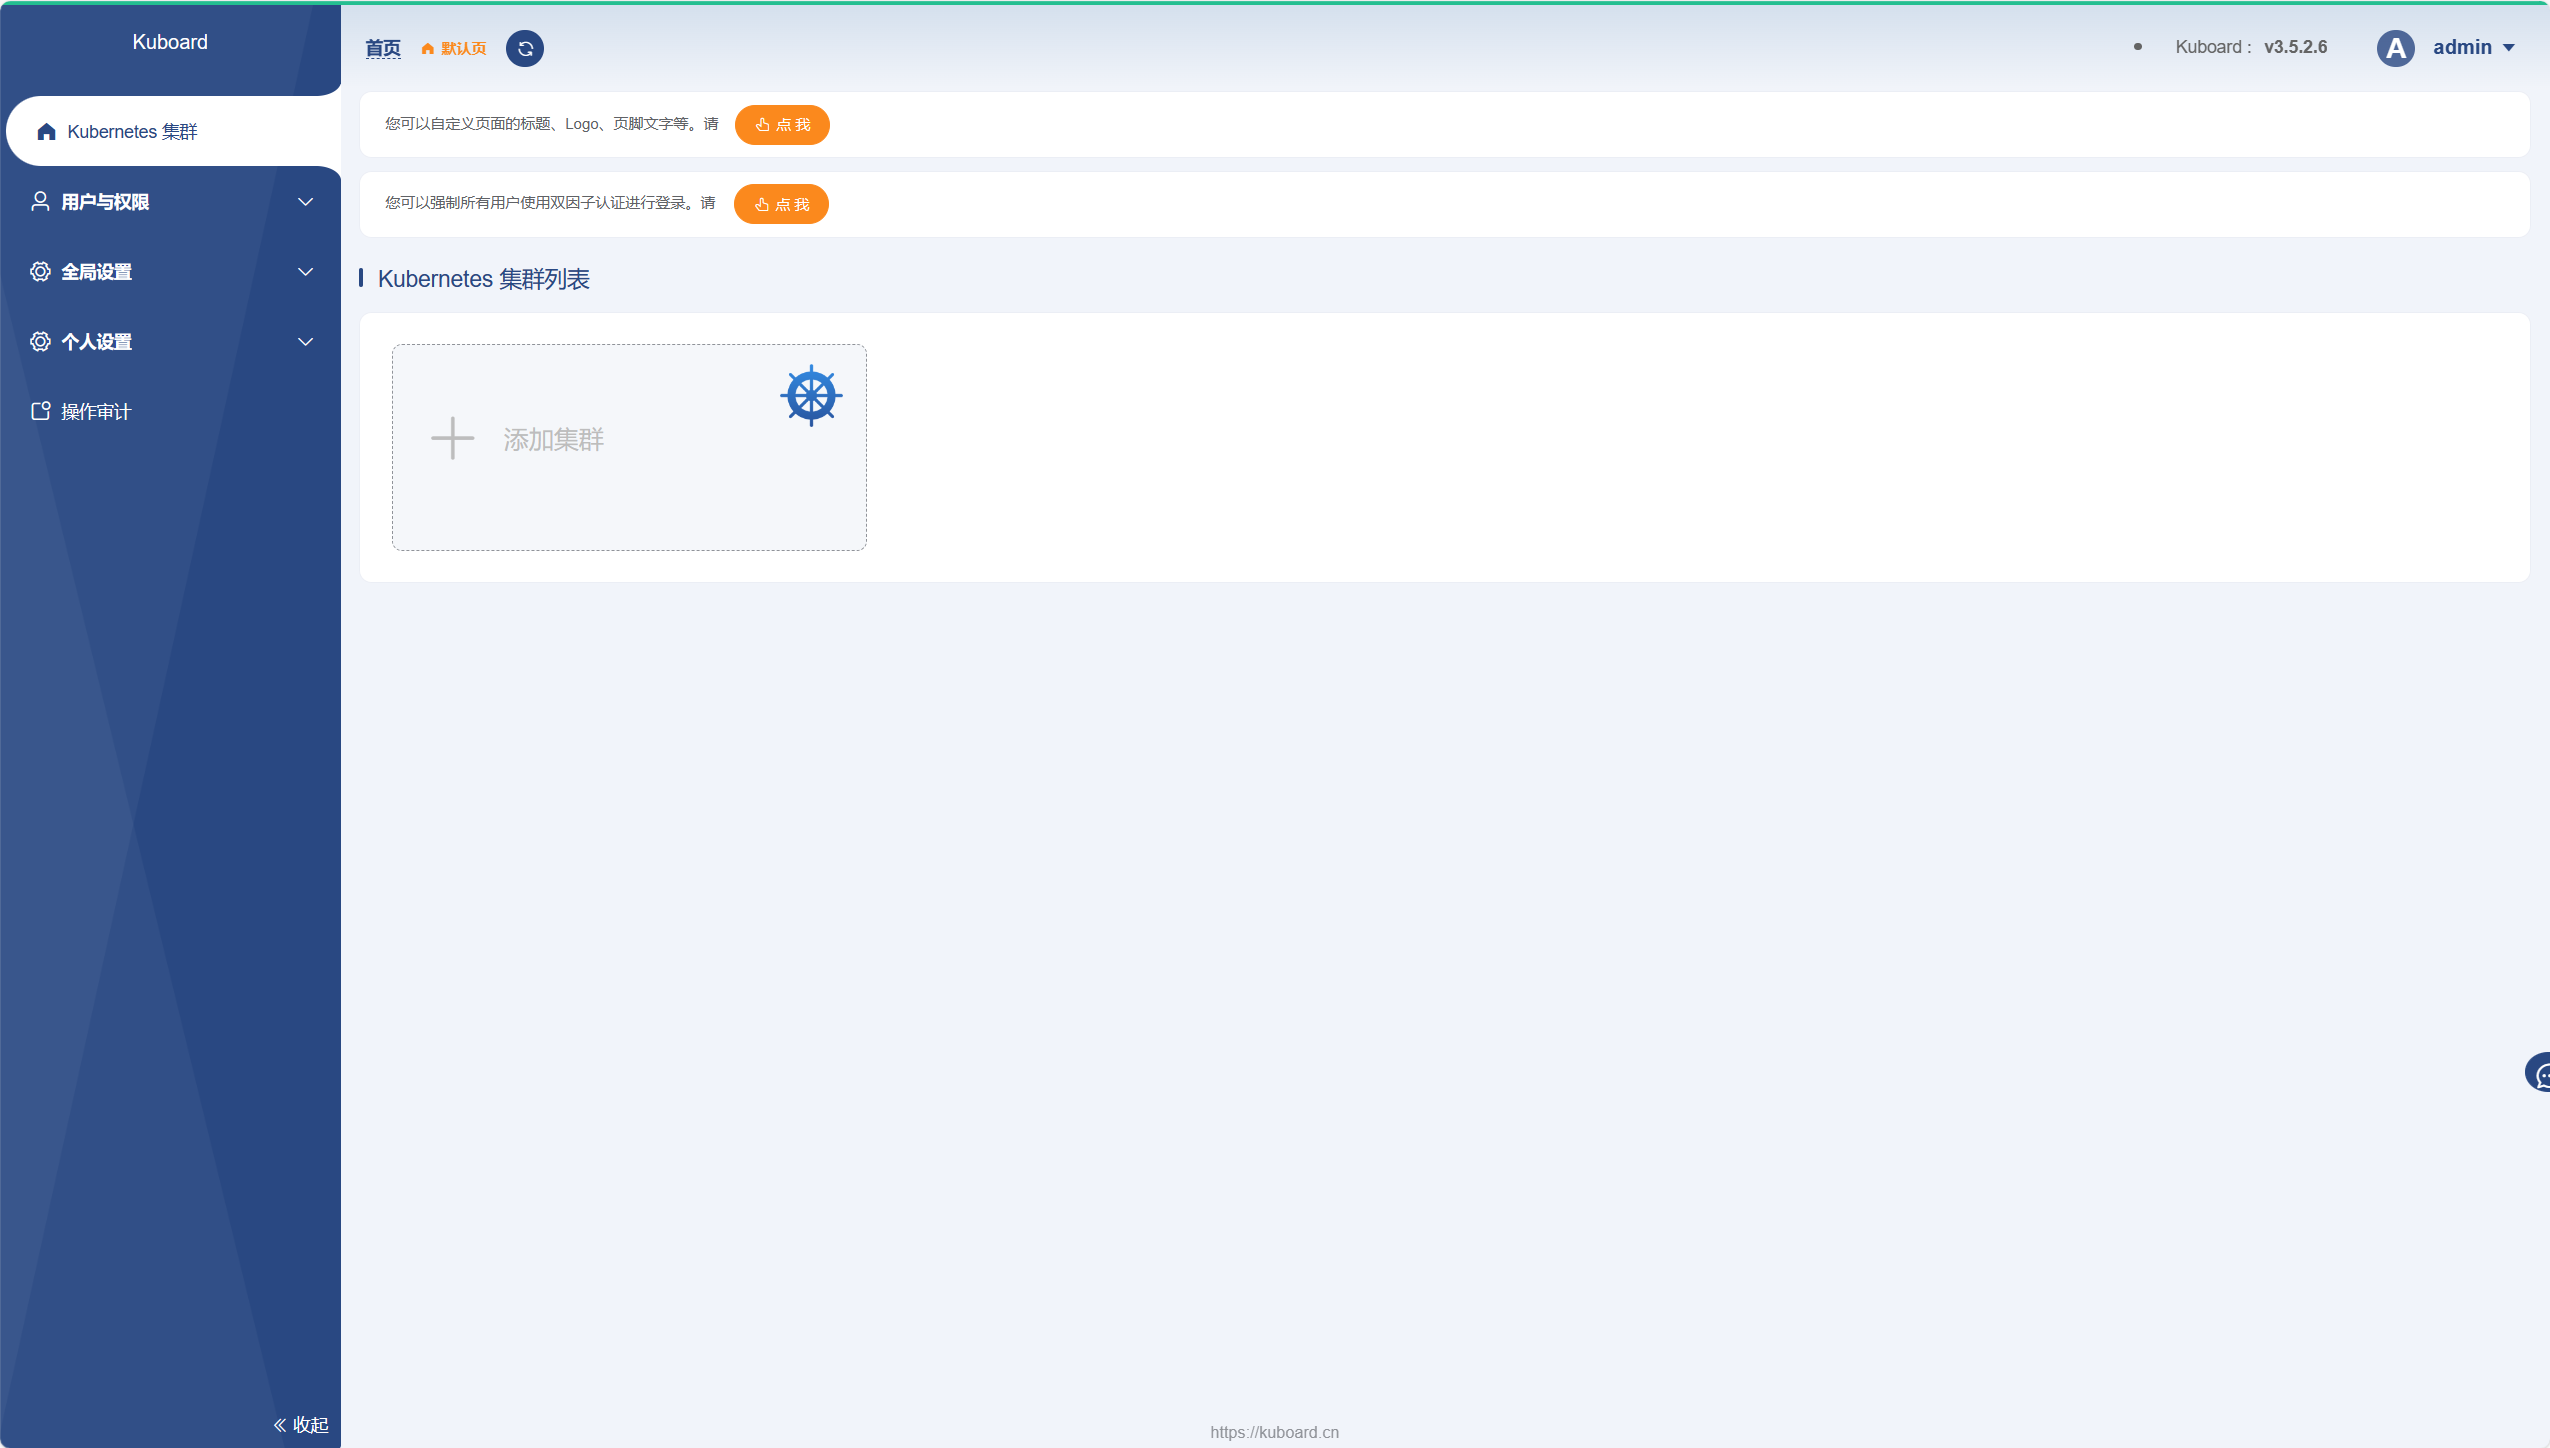
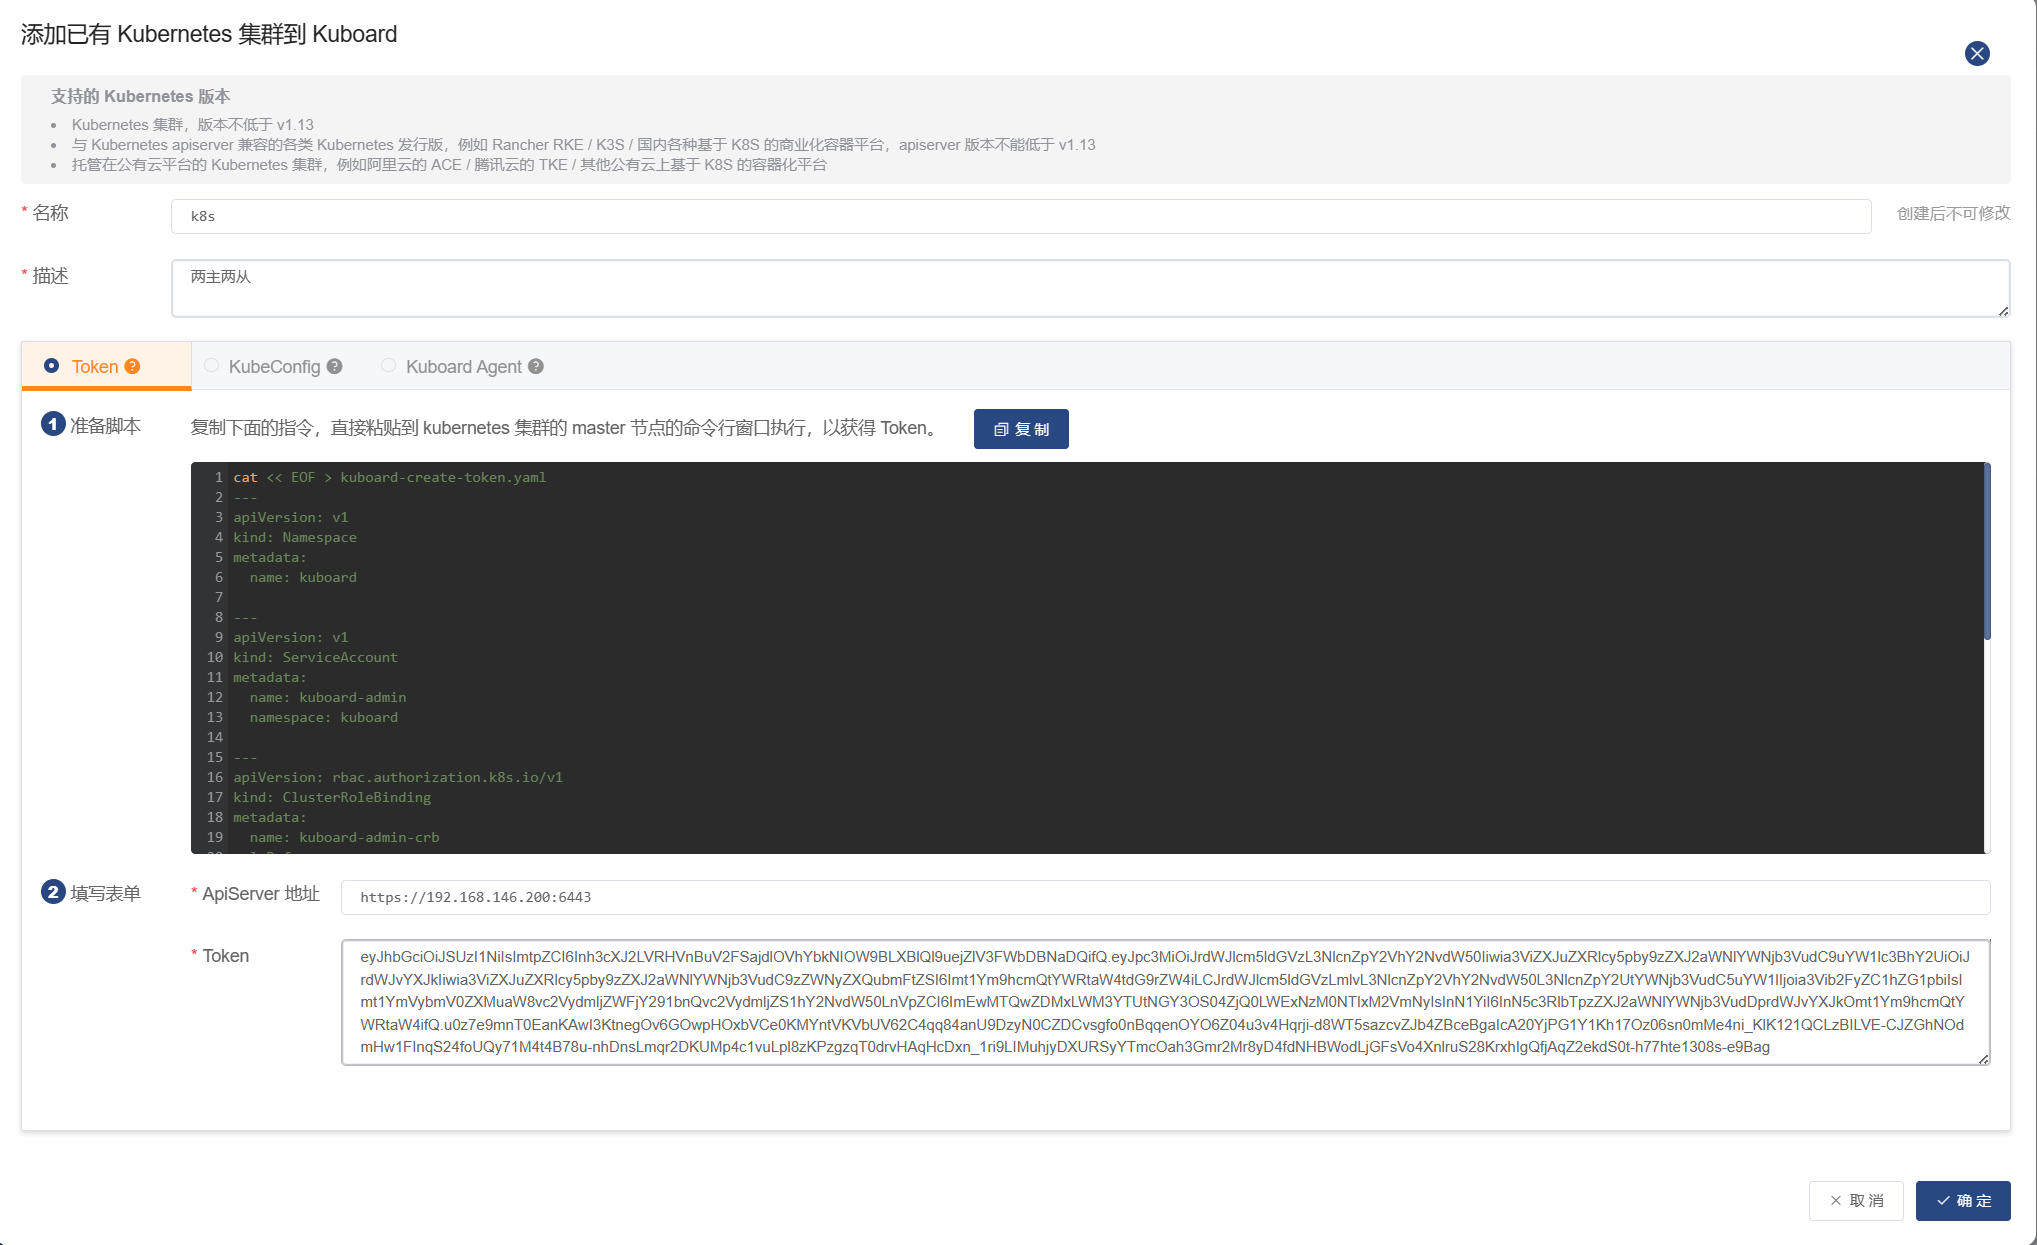
点击添加集群,使用token方式进行认证
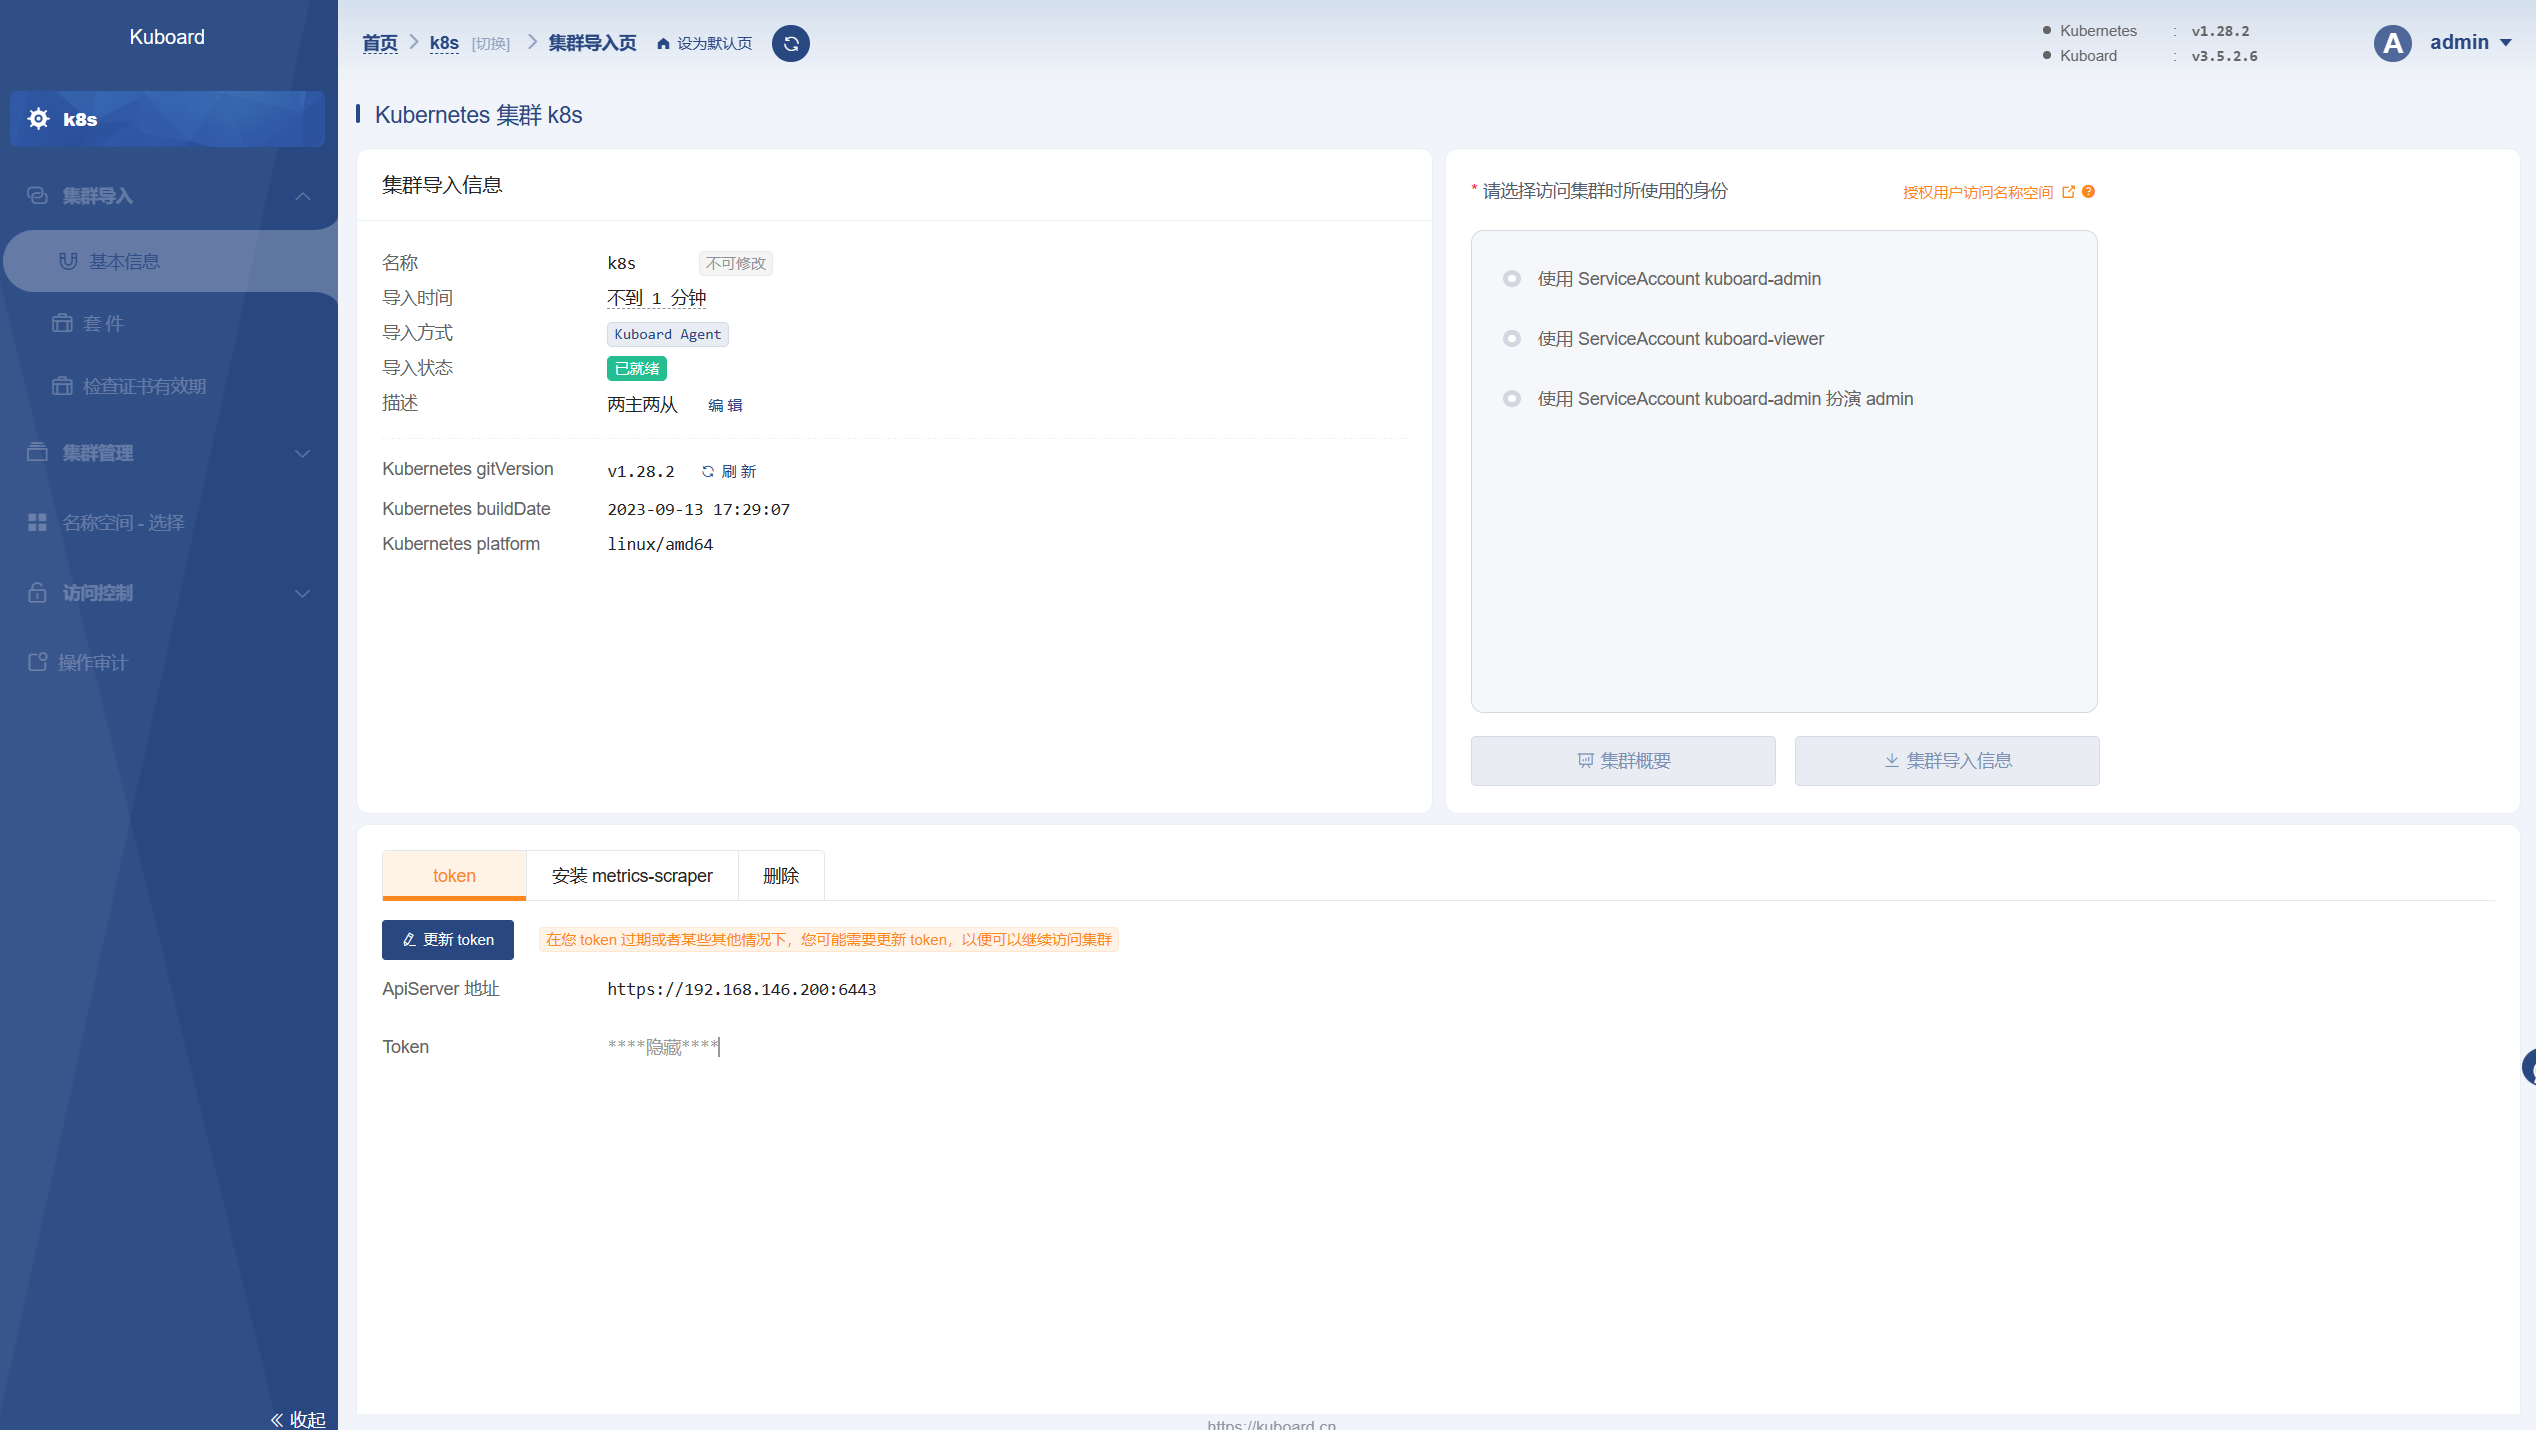
如下图说明集群导入成功,点击 kuboard-admin 后进入集群概要
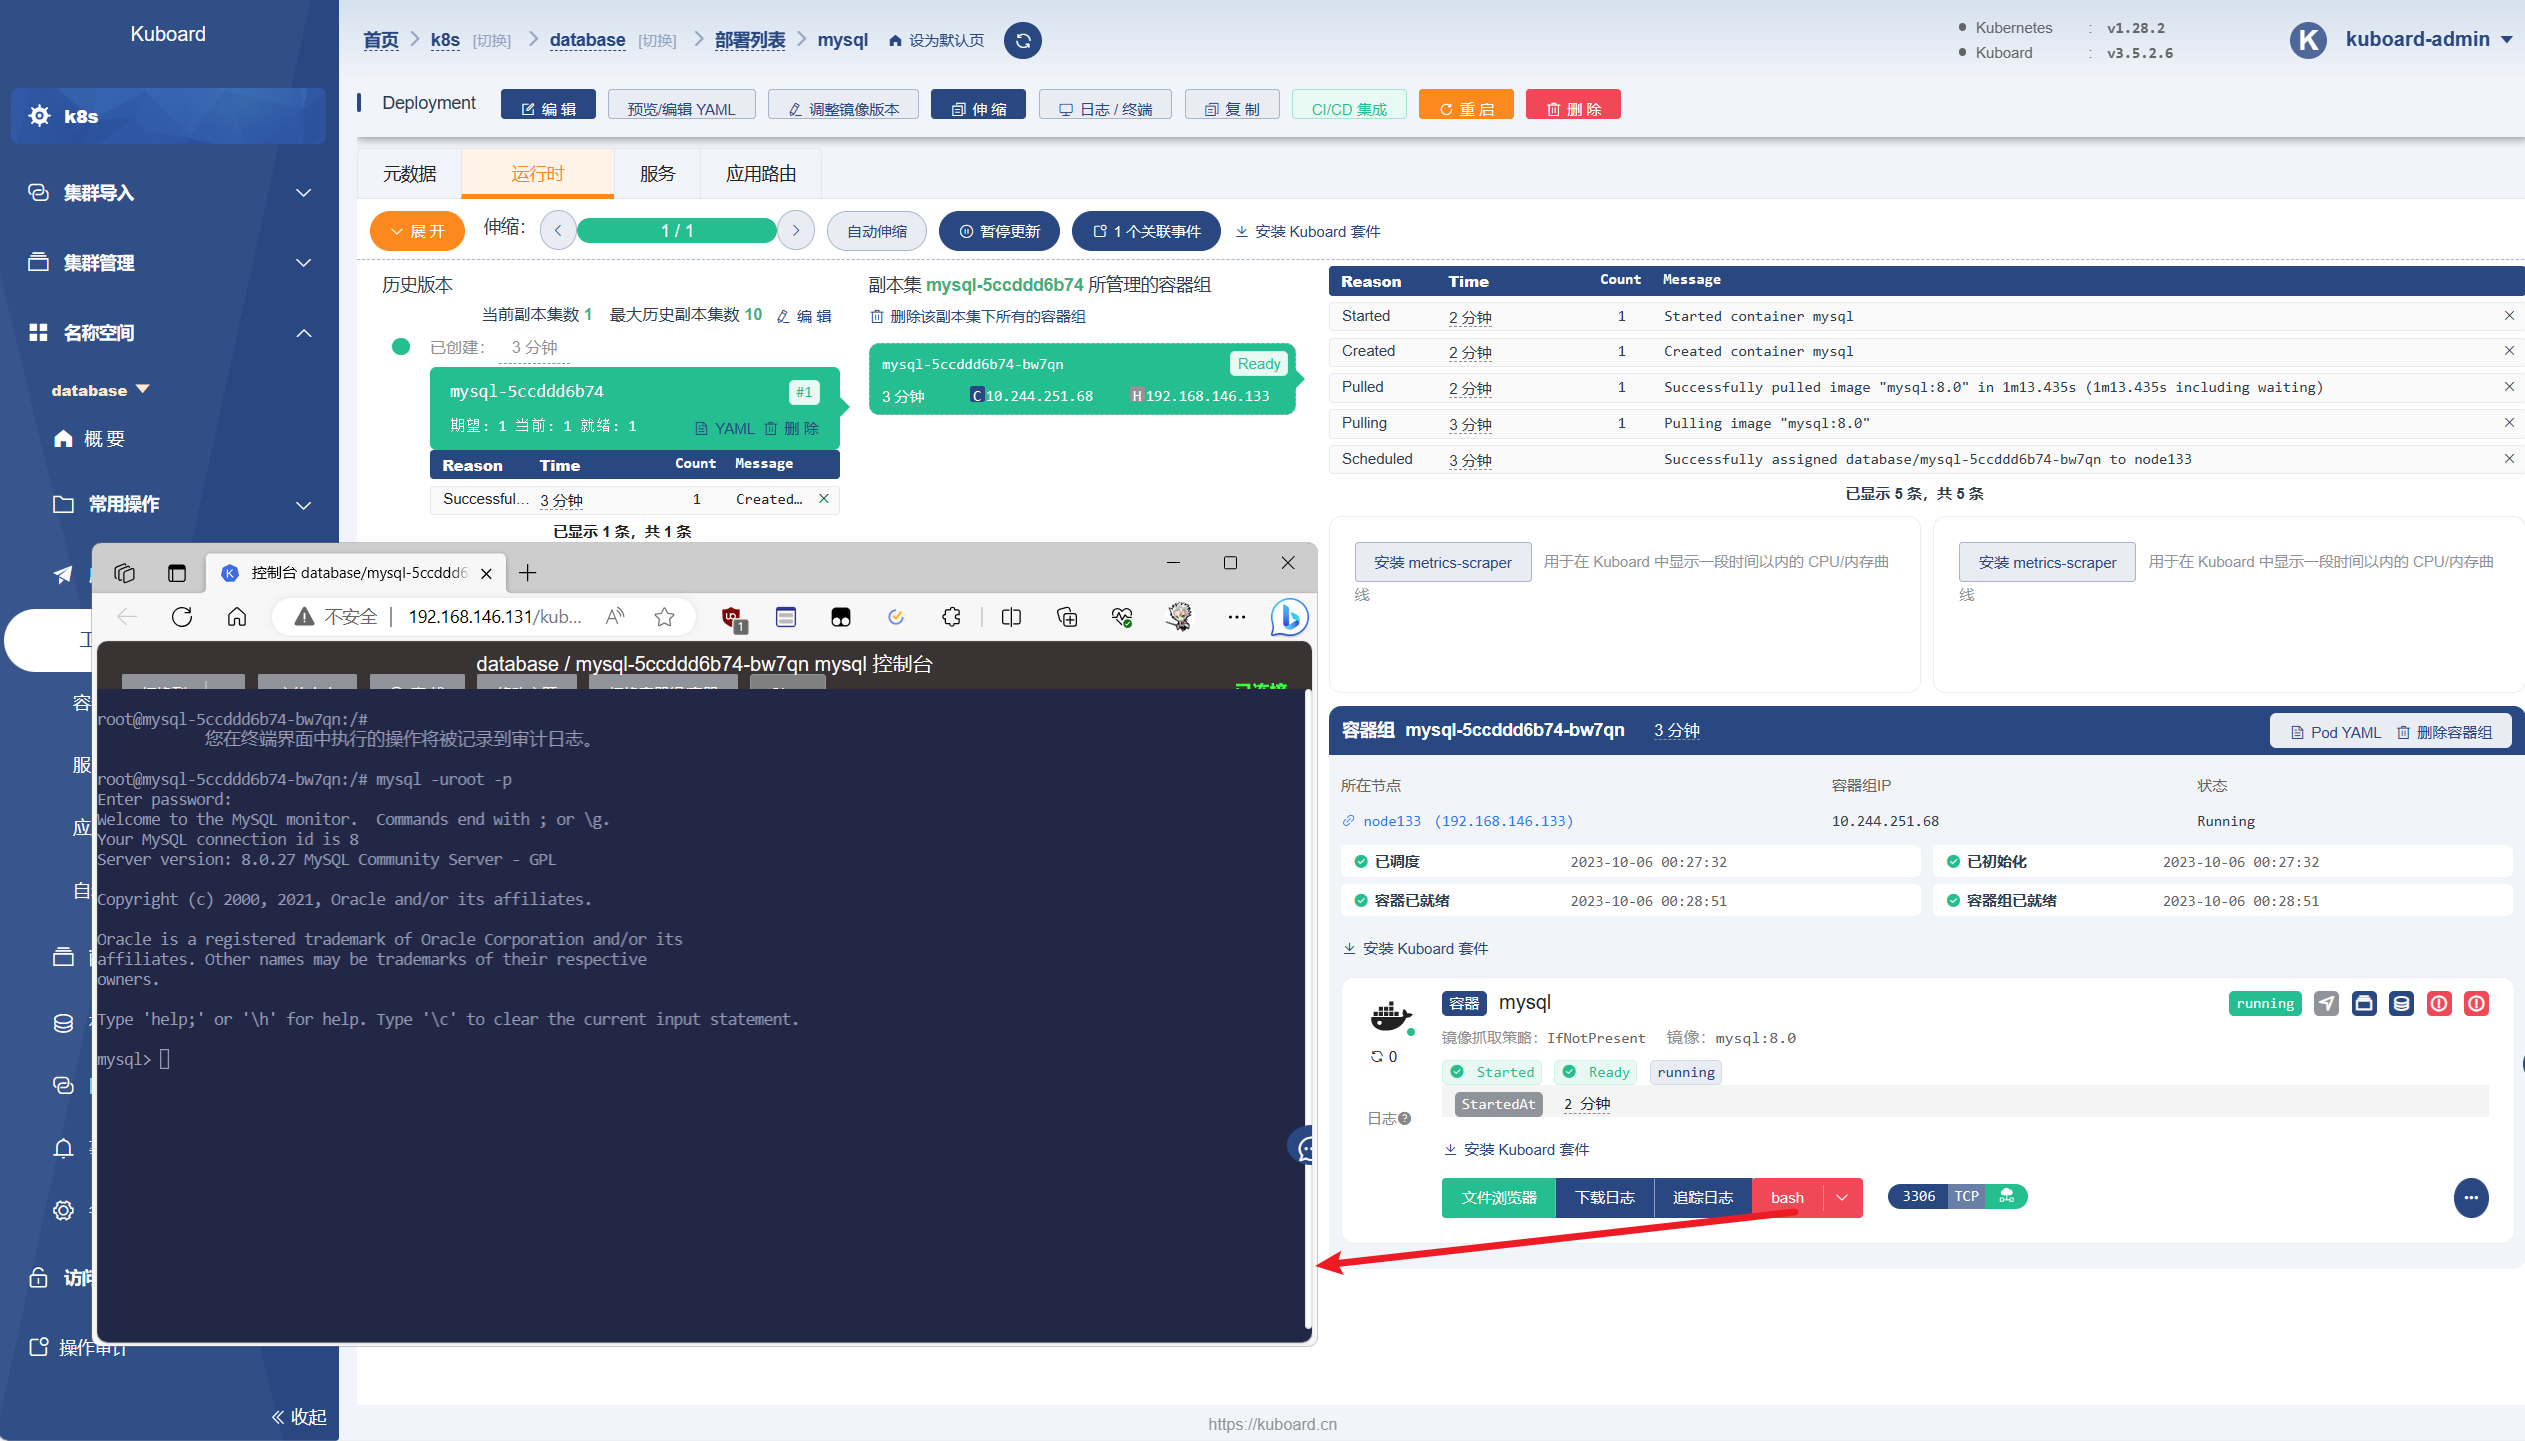
安装mysql进行测试 1 2 3 4 5 6 7 8 9 10 11 12 13 14 15 16 17 18 19 20 21 22 23 24 25 26 27 28 29 30 31 32 33 34 35 36 37 38 39 40 41 42 43 44 45 46 47 48 49 50 51 52 53 54 55 56 57 58 59 60 kubectl create ns database tee mysql_deploy.yaml <<EOF apiVersion: apps/v1 # apiserver的版本 kind: Deployment # 副本控制器deployment,管理pod和RS metadata: name: mysql # deployment的名称,全局唯一 namespace: database # deployment所在的命名空间 labels: app: mysql spec: replicas: 1 # Pod副本期待数量 selector: matchLabels: # 定义RS的标签 app: mysql # 符合目标的Pod拥有此标签 strategy: # 定义升级的策略 type: RollingUpdate # 滚动升级,逐步替换的策略 template: # 根据此模板创建Pod的副本(实例) metadata: labels: app: mysql # Pod副本的标签,对应RS的Selector spec: # nodeName: k8s-worker01 # 指定pod运行在的node containers: # Pod里容器的定义部分 - name: mysql # 容器的名称 image: mysql:8.0 # 容器对应的docker镜像 volumeMounts: # 容器内挂载点的定义部分 - name: time-zone # 容器内挂载点名称 mountPath: /etc/localtime # 容器内挂载点路径,可以是文件或目录 - name: mysql-data mountPath: /var/lib/mysql # 容器内mysql的数据目录 - name: mysql-logs mountPath: /var/log/mysql # 容器内mysql的日志目录 ports: - containerPort: 3306 # 容器暴露的端口号 env: # 写入到容器内的环境容量 - name: MYSQL_ROOT_PASSWORD # 定义了一个mysql的root密码的变量 value: "123456" volumes: # 本地需要挂载到容器里的数据卷定义部分 - name: time-zone # 数据卷名称,需要与容器内挂载点名称一致 hostPath: path: /etc/localtime # 挂载到容器里的路径,将localtime文件挂载到容器里,可让容器使用本地的时区 - name: mysql-data hostPath: path: /data/mysql/data # 本地存放mysql数据的目录 - name: mysql-logs hostPath: path: /data/mysql/logs # 本地存入mysql日志的目录 EOF kubectl create -f mysql_deploy.yaml kubectl -n database get pods kubectl -n database describe pod kubectl -n database exec -it mysql-5ccddd6b74-bw7qn -- mysql -uroot -p
通过kuboard登录
